


Table of Contents
- Understanding Light Spill and Trespass on Outdoor Courts
- Full Cutoff Fixtures and Asymmetric Beam Optics Explained
- Reducing Glare for Player Performance and Visual Comfort
- Best LED Lights for Basketball Courts: What to Look For
- Residential Basketball Court Lighting Layout: A Step-by-Step Approach
- Dark Sky Compliance, Legal Requirements, and Zoning Rules
- Maintenance and Long-Term Glare Prevention
- Frequently Asked Questions
Last Updated: August 17, 2026
Glare from outdoor court lights is one of the most common complaints that kills neighborhood goodwill and can result in zoning violations. At Sports Vista USA, we've helped homeowners, schools, and recreation departments solve this problem: how to get a well-lit court without blinding neighbors or disrupting nearby properties. This guide covers outdoor court lighting solutions for glare, from technical fundamentals through residential layout, dark sky compliance, and maintenance.
The core principle is straightforward: glare is almost always a fixture selection and positioning problem, not a brightness problem. You don't need less light. You need better-directed light.
Understanding Light Spill and Trespass on Outdoor Courts
Light trespass occurs when light from one property falls onto an adjacent property without permission. Spill light is any illumination that escapes the intended target area, whether it lands on a neighbor's yard, window, or road. These concepts sit at the center of every glare complaint and shape every fixture decision you make.
Spill light from outdoor court lighting is particularly disruptive because courts are typically used in the evening, when ambient light is low and even modest intrusion is highly visible. A fixture aimed five degrees too high can throw a bright beam across a property line, lighting up a neighbor's fence or window at 9 p.m. Common sources include fixtures mounted too low with upward tilt, wide-beam floodlights without optical shielding, and fixtures positioned at court corners rather than sidelines.
Residential lighting ordinances in many municipalities set maximum foot-candle levels at property lines, often as low as 0.1 to 0.5 foot-candles. Exceeding these thresholds is a code violation in jurisdictions with dark sky or light trespass ordinances.
On-court glare affects players directly: it reduces contrast, causes eye strain, and makes tracking a ball difficult. Offsite glare affects neighbors, passing drivers, and wildlife. The distinction matters because the fix for each differs slightly. On-court glare is addressed through fixture tilt angles and mounting height. Offsite glare requires full cutoff optics, shielding, and careful beam angle selection.
International Dark-Sky Association guidance on light trespass and shielding
Full Cutoff Fixtures and Asymmetric Beam Optics Explained
Full cutoff and asymmetric optics are the two most important specifications when evaluating outdoor court lighting solutions for glare.
Full cutoff is a fixture classification in which zero lumens are emitted at or above the horizontal plane of the fixture. The fixture housing physically blocks all upward light. This differs from "cutoff" or "semi-cutoff" classifications, which allow small upward light emission. For court applications near residential properties, full cutoff is essential. It eliminates sky glow, reduces offsite glare, and focuses lumen output downward onto the playing surface.
The Illuminating Engineering Society's outdoor lighting standards provide the classification framework for cutoff ratings and are the reference point for most local ordinances.
Asymmetric optics shape the beam so that more light is thrown in one direction than another. For a court light mounted on a sideline pole, this means the beam is directed across the court rather than equally in all directions. The result: more foot-candles on the playing surface, less light thrown toward neighbors or into the sky. Zero-tilt asymmetric fixtures eliminate the upward-tilt problem that causes most spill light complaints with traditional floodlights.

Reducing Glare for Player Performance and Visual Comfort
Glare degrades player performance. A player tracking a basketball against a bright fixture background loses contrast and depth perception. This is a real safety and performance issue.
Fixture tilt is the angle at which the fixture is aimed relative to vertical. Higher tilt increases both on-court coverage and offsite spill. For basketball courts, mounting height of 16 to 20 feet is standard for residential installations. Tilt angles above 15 degrees from vertical increase spill light significantly. Full cutoff fixtures should be aimed at zero tilt where asymmetric optics provide coverage; for non-asymmetric fixtures, keep tilt below 10 degrees and use shields.
Color temperature is measured in Kelvin and describes the color appearance of light. For outdoor courts, the practical range is 4000K to 5700K. 4000K (neutral white) reduces sky glow and is preferred by dark sky ordinances; 5000K-5700K (cool white) offers higher contrast and better ball visibility. Flicker-free operation is essential for any court used for video recording or broadcast, and it reduces eye fatigue during extended play. Look for fixtures with a flicker rate above 1000 Hz or a flicker percentage below 1%.
Best LED Lights for Basketball Courts: What to Look For
The best LED lights for basketball courts combine high lumen output with directional control, full cutoff optics, and weather resistance. What separates a good court light from a poor one:

- Full cutoff housing: No upward light emission; essential for residential installations
- Asymmetric beam optics: Directs light across the court, not equally in all directions
- Mounting height compatibility: Fixture optics should match the pole height (16-20 feet for residential)
- IP65 or higher weather rating: Outdoor exposure requires sealed optics and housing
- Flicker-free LED driver: Critical for video and player comfort
- Solar or grid-tied options: Solar eliminates trenching costs for remote court locations
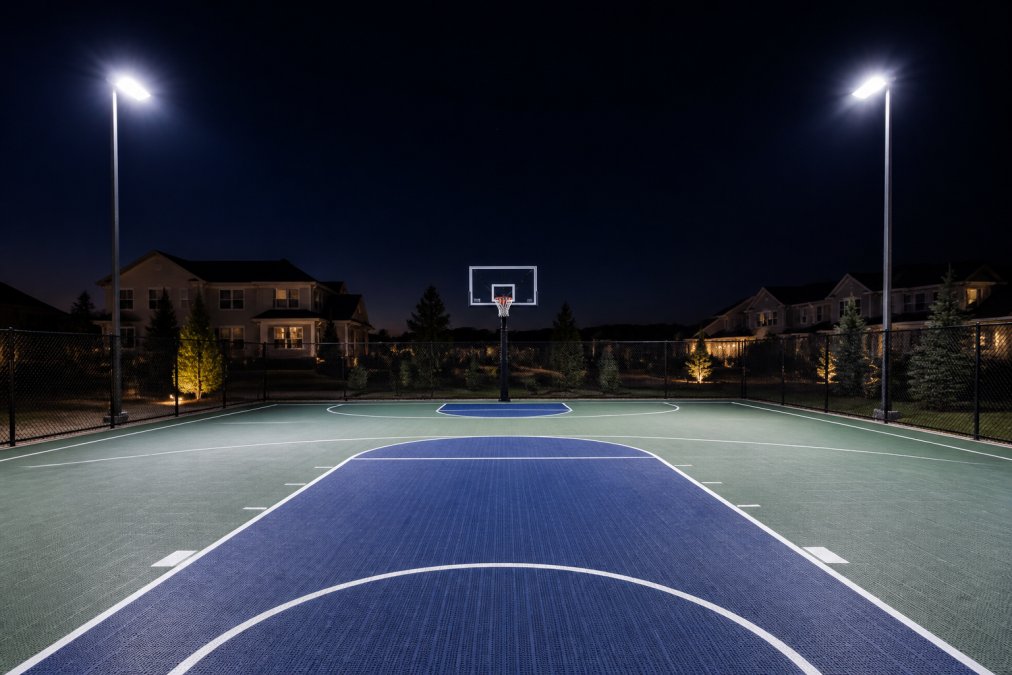
Sports Vista USA carries solar-powered court lighting options that address the most common residential installation challenges. The First Team Solar Powered Court Light delivers 14,800 lumens from a freestanding fixture mounted approximately 16 feet above the playing surface, with no electrical trenching required. For courts needing higher output, the Dominator 100W LED Solar Court Light with Pole handles basketball courts, pickleball courts, and multi-sport areas without grid connection. Both eliminate the most expensive part of traditional court lighting installations: the electrical work.
| Feature | What to Require | Why It Matters |
|---|---|---|
| Cutoff classification | Full cutoff | Eliminates upward light and offsite spill |
| Beam type | Asymmetric | Covers court without over-illuminating surroundings |
| Color temperature | 4000K-5700K | Visual comfort and dark sky compliance |
| CRI | 70 or higher | Ball-tracking contrast for players |
| Weather rating | IP65 minimum | Outdoor durability in rain and humidity |
| Flicker rate | Above 1000 Hz | Reduces eye fatigue and suits video recording |
| Power source | Solar or grid | Solar avoids trenching for remote locations |
Residential Basketball Court Lighting Layout: A Step-by-Step Approach
The most common residential lighting mistakes are placing poles at court corners and using parking-lot fixtures. A purpose-built layout solves most glare problems before installation begins.
Step 1: Map Your Court Dimensions and Foot-Candle Goals
A standard residential half-court is 47 by 50 feet. A full court runs 84 by 50 feet. Before selecting fixtures, establish your court boundaries, nearby structures or property lines, target foot-candle level (recreational play typically requires 20-30 foot-candles; competitive practice warrants 30-50 foot-candles), and property line setback. This mapping determines pole placement, fixture count, and the maximum tilt angle you can use without exceeding property-line light levels.
Step 2: Choose Pole Positions and Mounting Heights
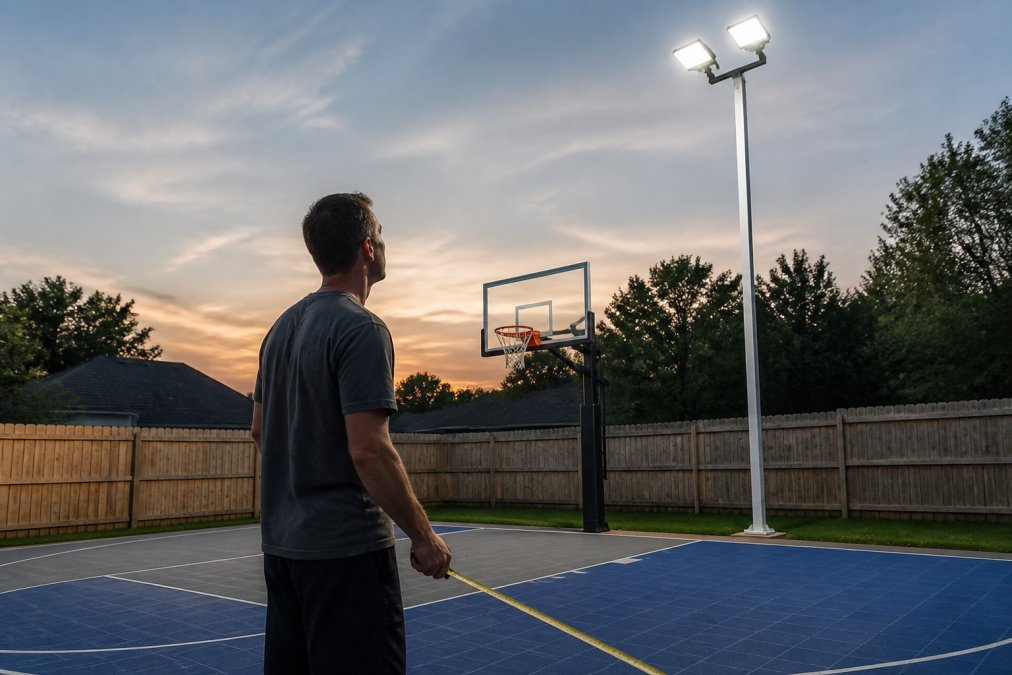
For a residential half-court, two poles positioned along the sidelines (not the corners) is standard. Sideline placement allows asymmetric fixtures to throw light across the court width rather than diagonally, reducing spill significantly. Place poles at the midpoint of each long sideline, 2 to 4 feet outside the court boundary, mounted at 16 to 20 feet, and set back at least 10 feet from any property line where possible. For full courts, four poles (two per sideline at the quarter-court marks) provide more uniform illumination and allow lower lumen output per fixture.
Step 3: Aim and Tilt Fixtures to Minimize Glare Zones
With poles positioned, aim each fixture toward the center of the court half it serves. Start with zero tilt if using asymmetric optics; add tilt only if foot-candle measurements show under-illuminated zones. Install light shields on the neighbor-facing side of each fixture if the property line is within 20 feet. Measure foot-candle levels at the court surface and property line after installation, then adjust tilt in 2-degree increments until the surface level meets your target without exceeding the property-line threshold.
Dark Sky Compliance, Legal Requirements, and Zoning Rules
Dark sky compliance is not just an environmental preference. Many municipalities have adopted ordinances based on the IDA Model Lighting Ordinance framework that set binding requirements for fixture type, color temperature, and light trespass levels.
Key compliance points for residential court lighting include fixture type (many ordinances require full cutoff fixtures for any new outdoor installation above a threshold lumen output), color temperature cap (some ordinances cap color temperature at 3000K or 4000K to reduce blue-light sky glow), curfew requirements (some jurisdictions require outdoor lights above a certain brightness to shut off by 10 or 11 p.m.), and property-line limits (foot-candle maximums at property lines are common; 0.1 to 0.5 foot-candles is typical).
Before installing any court lighting, check with your local planning or zoning department. Violations can result in required removal or modification of fixtures at your expense. Some homeowners' associations also have stricter rules than local ordinances. For schools, parks, and commercial facilities, requirements are typically more detailed. The U.S. Department of Energy's outdoor lighting guidance for sports facilities provides a useful reference for institutional installations.
Maintenance and Long-Term Glare Prevention
Most lighting guides stop at installation, leaving you exposed to glare problems that develop afterward due to fixture drift, lens degradation, and vegetation changes. A fixture perfectly aimed at installation can develop a 5-degree upward tilt within a year or two due to pole vibration from wind, seasonal ground movement, and physical contact.
Annual maintenance checklist for outdoor court lighting:
- Inspect each fixture's tilt angle; compare to installation settings
- Clean lenses and housing to remove dirt and buildup that scatter light
- Check for vegetation growth that may redirect or block light, requiring fixture re-aiming
- Measure foot-candle levels at the court surface and property line; compare to baseline measurements
- Inspect shields and glare control accessories for physical damage
- Test flicker performance if the court is used for video recording
LED fixtures have long rated lifespans, but driver components that control flicker and power output can degrade faster than the LED array itself. If you notice increased flicker or inconsistent output, the driver is the first component to check. Lens yellowing from UV exposure can shift effective color temperature and reduce lumen output; lens replacement may restore original optical performance. The most overlooked long-term factor is vegetation. A tree that was 10 feet away at installation may partially block a fixture after five years, forcing remaining fixtures to compensate. Build vegetation management into your annual maintenance plan.
Managing glare from outdoor court lighting is a solvable problem when you address fixture selection, positioning, and ongoing maintenance together. Sports Vista USA's solar-powered court lighting options, including the First Team Solar Court Light and the Dominator 100W LED Solar Court Light with Pole, are built for residential and institutional installations where directional control and zero-trenching installation matter. Explore the full court lighting selection at Sports Vista USA and find the fixture configuration that fits your court dimensions, property setbacks, and compliance requirements.
Frequently Asked Questions
How do you reduce glare on an outdoor basketball court?
The most effective approach combines full cutoff fixtures, asymmetric beam optics, and correct fixture tilt. Full cutoff housings block light from projecting above the horizontal plane, while asymmetric optics direct lumen output onto the court surface rather than toward players' eyes. Mounting lights at or above 16 feet and tilting fixtures no more than 15 degrees from vertical also significantly cuts direct glare. Adding light shields to existing fixtures is a lower-cost option when replacing hardware isn't practical.
What type of lighting is best for outdoor sports courts?
LED floodlights with full cutoff housings and asymmetric optics are the best choice for outdoor court lighting glare control. LEDs deliver consistent lumen output, operate flicker-free, and allow precise beam angle selection that high-intensity discharge lamps cannot match. A color temperature between 5000K and 5700K provides the contrast ratio and visual clarity players need to track a fast-moving ball, while keeping energy consumption well below older metal halide systems.
How high should outdoor court lights be mounted to avoid glare?
For a residential basketball court, mounting height of at least 16 feet is the standard starting point. Taller mounting reduces the angle at which light enters players' peripheral vision, which directly lowers glare intensity. Commercial and institutional courts typically mount fixtures at 20 to 25 feet. The key tradeoff is that higher poles require higher lumen output to maintain adequate foot-candles at the playing surface, so fixture selection and photometric analysis should account for both height and output together.
What is light spill and how can it be prevented?
Light spill, also called light trespass, occurs when illumination from a court fixture lands on neighboring properties, windows, or public areas beyond the intended playing surface. It is prevented by selecting full cutoff or dark sky compliant fixtures, using directional lighting with tight beam angles, and positioning poles so the primary beam pattern stays within the court boundary. Residential lighting ordinances in many jurisdictions set maximum foot-candle levels at property lines, so checking local zoning rules before installation helps avoid compliance issues.
This article was written using GrandRanker


Leave a comment
This site is protected by hCaptcha and the hCaptcha Privacy Policy and Terms of Service apply.