

Table of Contents
- Why Volleyball Court Setup Time Drains Facility Operations
- Court Dimensions, Buffer Zones, and Surface Prep That Speed Up Assembly
- SOP-Driven Volleyball Court Setup: Step-by-Step for Setup Crews
- Portable Volleyball Net Setup Time: Systems Built for Speed
- Best Volleyball Net Tensioning Tools for Faster, Safer Courts
- Multi-Use Athletic Facility Court Conversion: Scheduling and Layout
- Court Marking, Maintenance, and Safety Standards That Keep Downtime Low
- Conclusion
Last Updated: August 16, 2026
Why Volleyball Court Setup Time Drains Facility Operations
Volleyball court setup is one of the most underestimated operational burdens in athletic facility management. At Sports Vista USA, we hear it constantly from facility managers and athletic directors: setup crews spending 90 minutes or more on a single court conversion, only to do it again three times in a single day. That is not a minor inconvenience. It is a direct hit to scheduling capacity, staff overtime, and athlete time on the floor.
The core problem is not effort. It is the absence of a repeatable system. Most facilities treat court setup as an improvised task rather than a managed workflow. Equipment gets staged in the wrong order. Net tensioning takes multiple attempts. Floor tiles get misaligned and have to be relaid. Each small inefficiency compounds into a setup that drags on far longer than it needs to.
Volleyball court setup time reduction is achievable at almost every facility. The difference between a 30-minute setup and a 90-minute one comes down to three things: the right equipment, a documented procedure, and a crew that has rehearsed it. Below, this guide breaks down exactly how to achieve all three, covering court dimensions, surface prep, SOP development, net systems, tensioning tools, multi-sport scheduling, and maintenance protocols that keep downtime low.
This is the part most guides get wrong: they focus on equipment alone. Equipment matters, but without an operational framework around it, even the best gear gets installed slowly.
Court Dimensions, Buffer Zones, and Surface Prep That Speed Up Assembly
Understanding the physical requirements of a regulation court before installation begins is the single fastest way to eliminate rework during setup.
Standard Court Dimensions and Required Buffer Zones
A regulation indoor volleyball court measures 18 meters long by 9 meters wide, with a minimum buffer zone of 3 meters on each end line and 3 meters on each sideline, as specified by USA Volleyball official rules and court standards. For competitive play, a 5-meter end buffer is preferred. Outdoor and sand courts follow similar footprint logic, though surface containment requirements differ.
Getting these numbers wrong before you start means repositioning posts, re-tensioning the net, and potentially relaying modular flooring. Pre-marking your facility floor with permanent or semi-permanent court outlines, including buffer zone boundaries, eliminates that guesswork entirely. A crew that can drop posts into pre-marked anchor points without measuring saves 10 to 15 minutes per setup.
| Court Type | Playing Surface | Minimum End Buffer | Minimum Side Buffer |
|---|---|---|---|
| Indoor (competition) | 18m x 9m | 5m preferred, 3m minimum | 3m |
| Indoor (recreational) | 18m x 9m | 3m | 2m |
| Outdoor / Sand | 16m x 8m | 3m | 3m |
| Multi-sport overlay | Varies | Match primary sport | Match primary sport |
Sub-Surface Preparation for Seamless, Fast Installs
Sub-surface preparation is where portable volleyball setups fail most often. Uneven floors cause modular tile locking systems to sit proud, creating tripping hazards and requiring repeated adjustment. Before any court installation, the sub-surface should be swept, free of debris, and checked for low spots that cause tile flex.
For facilities using poured concrete or hardwood gym floors, this typically means a monthly inspection rather than per-event prep. For outdoor or temporary venue setups, a quick level check with a long straightedge before staging tiles can save significant rework. A seamless surface at the tile-to-tile interface is not just a safety standard, it is the foundation of assembly efficiency.
SOP-Driven Volleyball Court Setup: Step-by-Step for Setup Crews
The biggest mistake in facility operations is treating court setup as tribal knowledge. When only one crew member knows the right sequence, every absence creates a slow, error-prone setup. A written Standard Operating Procedure changes that.
Pre-Tournament Staging Strategy
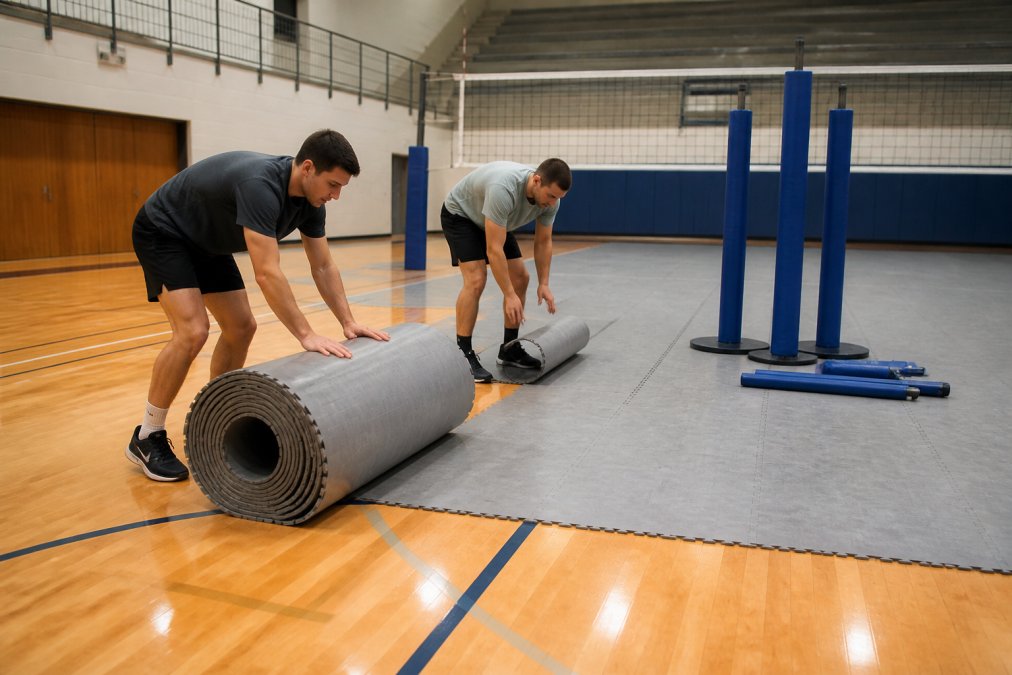
Pre-tournament staging is the operational move that separates fast facilities from slow ones. Rather than pulling equipment from storage at setup time, stage everything the night before or at minimum two hours before the first match.
A practical staging checklist for a two-court volleyball setup:
- Confirm sub-surface is clean and level
- Position modular floor tile pallets at court entry points (not center floor)
- Stage net posts, sleeves, and hardware at each court anchor point
- Pre-sort net cables, tensioning tools, and hardware into labeled bins
- Confirm antenna clips, pads, and boundary markers are in crew kits
- Verify referee stand and scorekeeper table placement before tile lay begins
The sequencing matters. Tiles go down before posts are set. Posts are set before net cables are run. Net cables are run before tensioning begins. Crews that skip steps or work out of sequence almost always have to backtrack.
Ergonomic Equipment Handling and Tool Optimization
Ergonomic equipment handling is rarely discussed in setup guides, but it directly affects both assembly speed and crew injury rates. Net posts for indoor volleyball systems typically weigh between 40 and 80 pounds depending on construction. Carrying them unsupported across a gym floor creates fatigue and slows subsequent tasks.
Practical ergonomic adjustments for setup crews:
- Use two-wheel dollies rated for post weight, never hand-carry posts across long distances
- Keep post sleeves or floor sockets clear of tile during staging to avoid awkward insertion angles
- Store cable reels on a cart rather than the floor to eliminate bending during unspooling
- Use torque-rated ratchet tools rather than manual wrenches to reduce repetitive strain on tensioning
Tool optimization goes hand in hand with ergonomics. A crew using mismatched tools, one member with a ratchet, another with a hand-crank, will not move at a consistent pace. Standardize toolkits across all crew members so everyone works the same procedure at the same speed.
Portable Volleyball Net Setup Time: Systems Built for Speed
Portable volleyball net setup time varies more than most buyers expect. The difference between a well-engineered portable system and a budget alternative often shows up entirely in setup time, not in how the net plays.
The fastest portable systems share three design characteristics: freestanding base stability that does not require floor anchors, tool-free height adjustment with indexed locking positions, and integrated cable management that prevents tangling during deployment. Systems requiring floor anchor drilling or custom hardware for each height adjustment will consistently run 20 to 30 minutes longer per setup than tool-free alternatives.
For facilities running multiple courts per day, portable volleyball net setup time should be a primary purchasing criterion, not an afterthought. Ask any supplier for a documented setup time under controlled conditions before committing to a system. A crew that can deploy a portable net in under 10 minutes per court is operating at a competitive standard.
Best Volleyball Net Tensioning Tools for Faster, Safer Courts
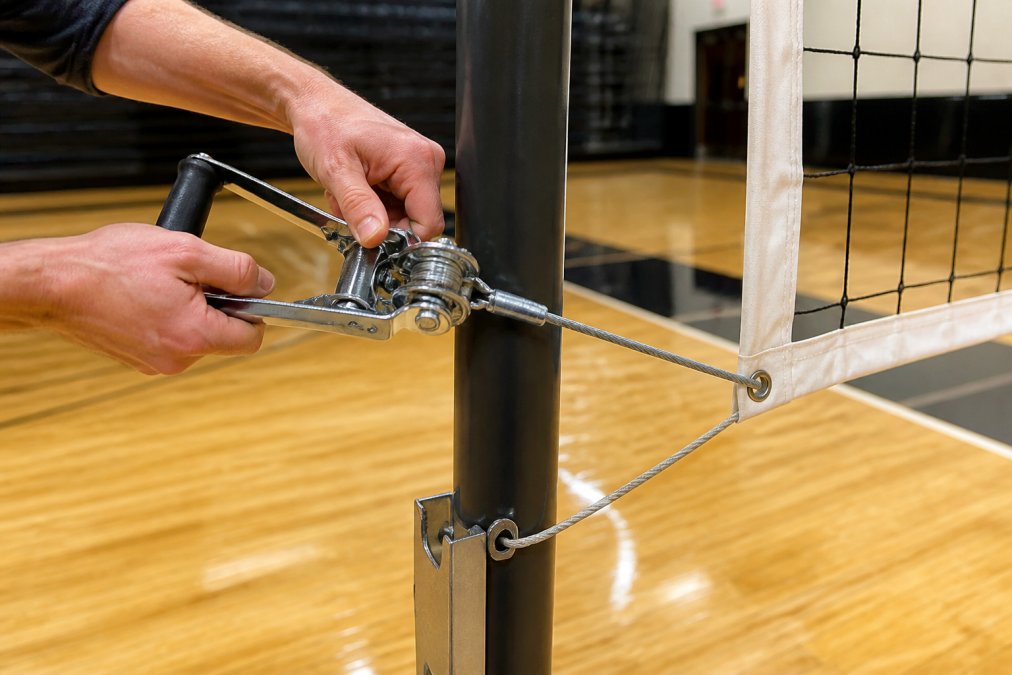
The best volleyball net tensioning tools are ratchet-style cable tensioners with a rated working load that matches the cable diameter specified by your net system. Hand-crank tensioners are slower and inconsistent; ratchet tools apply repeatable, measurable tension with far less crew effort.
Key specifications to look for in tensioning tools:
- Ratchet mechanism with a positive pawl lock (prevents cable slip under load)
- Compatible jaw or hook size for your net cable gauge (typically 3mm to 5mm for indoor systems)
- Integrated tension indicator or torque rating to ensure consistent net height and sag
- Corrosion-resistant finish for facilities with high humidity or outdoor use
A common mistake is over-tensioning the net cable, which stresses post sleeves and floor anchors beyond their rated load. According to [USA Volleyball equipment(/collections/all-volleyball-equipment) standards documentation | usavolleyball.org], net tension should achieve a taut, level top tape without deflection at center, not maximum cable tightness. Proper tool selection makes hitting that specification repeatable rather than a matter of crew judgment.
Sports Vista USA offers net systems and compatible tensioning hardware designed to work together, which eliminates the guesswork of matching tools to cable specs across different manufacturers.
Multi-Use Athletic Facility Court Conversion: Scheduling and Layout
Multi-sport facility court conversion is where volleyball court setup time reduction gets genuinely complex. A gym running basketball in the morning and volleyball in the afternoon is not just a logistics challenge, it is a scheduling and permitting challenge that most operational guides skip entirely.
Permit and Scheduling Requirements for Shared Venues
Shared venues operated by schools, parks, or recreation departments are subject to facility use agreements that govern court configuration changes. In many cases, the Americans with Disabilities Act facility accessibility standards also apply to temporary court configurations, requiring that buffer zones do not obstruct accessible pathways. Any court layout that narrows an accessible route must be reviewed against ADA clearance requirements before the setup is finalized.
Scheduling requirements for multi-sport facilities typically include:
- Minimum turnaround time between sports (commonly 30 to 60 minutes in school facility use agreements)
- Documentation of court configuration for insurance and liability purposes
- Advance notice requirements for custodial and operations staff
- Approval for any floor anchor use or surface penetration
Building setup time directly into the scheduling block, rather than treating it as a buffer, is the operational shift that prevents court rotation from running late.
Modular Flooring and Tile Locking Systems for Court Rotation
Modular flooring with an interlocking tile locking system is the fastest solution for facilities converting between sports. Unlike poured or glued surfaces, modular tiles can be laid and removed without tools, and their court markings can be integrated into the tile pattern itself, eliminating the need for tape application and removal between sports.
The tile locking system quality determines both assembly speed and surface integrity. A well-designed locking system snaps tiles together with positive engagement, requires no mallet or forced fit, and holds the surface seamless under lateral load. Poorly designed systems gap under foot traffic, creating both a tripping hazard and a surface that has to be relaid mid-event.
For facilities running three or more court rotations per day, modular flooring with integrated volleyball court marking is worth the investment. The reduction in tape labor alone typically justifies the cost within a single season.
Court Marking, Maintenance, and Safety Standards That Keep Downtime Low
Court marking and maintenance are the operational details that most facilities treat reactively. A line tape that peels mid-tournament forces a stoppage. A post sleeve that corrodes and sticks adds 10 minutes to every setup. Addressing these proactively keeps scheduled downtime predictable and unscheduled downtime rare.
For facilities using tape-based court marking on hardwood or sport court surfaces, the practical standard is to use tape rated for the specific floor surface and to remove it within 72 hours of application. Tape left longer bonds more aggressively and risks surface damage during removal. For facilities running frequent volleyball court setup cycles, semi-permanent painted lines or integrated modular tile markings are the maintenance-friendly alternative.
Safety standards for volleyball court installations are addressed in guidance from ASTM International standards for sports surfaces and equipment, which covers surface friction coefficients, post padding requirements, and equipment load ratings. Facilities operating under school athletic association rules should also confirm that their court configuration and equipment meet state association standards, which in many cases reference ASTM or USA Volleyball specifications directly.
Post padding is a maintenance item that gets overlooked. Padding that has compressed, torn, or lost its attachment hardware no longer meets safety standards and should be replaced before the next event, not after. A crew that checks padding condition during setup, rather than waiting for a formal inspection, catches these issues before they become liability events.
Consistent court maintenance also extends equipment life. Net cables that are detensioned after each use rather than left at match tension last significantly longer. Post sleeves cleaned of debris after each setup seat correctly the next time. These small habits compound into meaningful reductions in equipment replacement costs and unplanned setup delays.
Setup crews and facility managers dealing with slow, inconsistent volleyball court setup often find that the equipment is only part of the problem. Sports Vista USA offers a range of volleyball net systems, portable court solutions, tensioning hardware, and modular flooring options designed for facilities that need reliable, repeatable performance across multiple setups per day. Check out our volleyball equipment selection to find systems matched to your facility's court rotation demands and setup crew size.
Frequently Asked Questions
What are the best practices for organizing volleyball equipment for quick setup?
Stage all equipment in assembly order before the event starts: posts and sleeves first, then the net, then tensioning hardware, then court marking tape or lines. Store gear in labeled carts or bins so crew members grab items in sequence without searching. Assign each crew member a specific role, one handles posts, one handles net attachment, one handles tensioning, and run a timed rehearsal before tournament day. This single-role approach consistently cuts volleyball court setup time by a significant margin.
How can facility managers reduce transition time between basketball and volleyball court configurations?
The fastest multi-use athletic facility court conversion relies on pre-marked floors, portable net systems with quick-release anchors, and modular flooring panels with a reliable tile locking system. Keeping volleyball posts on wheeled storage carts eliminates carry time across the gym. Scheduling court rotation with at least a 20-minute buffer between sports sessions also prevents rushed setups that create safety hazards. Document each conversion as a written SOP so any staff member can execute the changeover consistently.
What tools are essential for speeding up volleyball net tensioning?
A ratchet tensioning tool or a dedicated net winch handle is the single biggest upgrade for faster, safer net tensioning. These replace manual hand-cranking, which is slow and inconsistent. A torque-calibrated tensioner ensures the net reaches regulation tension without over-tightening the cable, which can damage posts over time. A measuring tape and a small level confirm net height quickly. Keep all tensioning tools in a dedicated pouch attached to the net cart so they are always at the point of use.
Are there specific net systems designed for rapid deployment in multi-use facilities?
Yes. Portable volleyball net systems with sleeve-style post anchors, telescoping uprights, and integrated cable tensioners are built specifically for rapid deployment. These systems eliminate the need for permanent floor sleeves, making them ideal for gyms that also host basketball, pickleball, or other sports. When evaluating options, look for systems where the net attaches with clip or hook hardware rather than threading, which alone can reduce portable volleyball net setup time by several minutes per court.
This article was written using GrandRanker


Leave a comment
This site is protected by hCaptcha and the hCaptcha Privacy Policy and Terms of Service apply.