


Last Updated: October 22, 2026
Quick Summary
To optimize volleyball court storage, audit your gear and map the room first, then move equipment up the walls and onto wheels using vertical racks, wall brackets, and mobile carts. Label zones by sport, keep nets loose and dry, and measure capacity before buying.
- Photograph each storage zone before reorganizing so before-and-after photos show how much floor space you reclaimed.
- Release net tension, coil loosely, and hang nets on wide hooks or in breathable bags to protect tension.
- Assign every durable item a unique ID and post a master sheet at the storage room door.
- Use four labeled zones so multi-sport facilities can convert the court without hunting for parts.
- Measure wall length to the lowest obstruction, doorway size, and floor footprint before buying any rack.
Table of Contents
- Step 1: Audit Your Current Volleyball Court Storage Space
- Volleyball Equipment Storage Ideas That Free Up Floor Space
- Volleyball Net Storage: Protect Tension and Extend Net Life
- Build a Volleyball Equipment Inventory Checklist
- Shared Gym Storage Ideas for Multi-Sport Facilities
- Plan Your Storage Measurements and Capacity Before You Buy
- Safety, Accessibility, and Low-Cost Phased Improvements
- Conclusion
- Frequently Asked Questions
Step 1: Audit Your Current Volleyball Court Storage Space
Volleyball court storage works best when you start with a full audit of what you own and where it currently sits. Equipment often piles up near net posts because nobody mapped the space first. A one-hour walkthrough can change that.
Grab a clipboard and a tape measure. Walk the court perimeter, the equipment room, and every closet that holds volleyball gear.
Map What You Have and Where It Lives
Sketch the room on graph paper. Mark doors, outlets, wall studs, and ceiling height. Then list every item by group:
- Net systems and their posts, cables, and tension tools
- Balls in carts, bags, or loose on shelves
- Antennas, pole pads, and safety pads
Note the floor area each pile eats. Most facilities lose usable court clearance to gear that has no assigned home. Mark traffic paths too, since a storage spot that blocks a doorway creates a safety problem.
Volleyball Equipment Storage Ideas That Free Up Floor Space
The fastest way to free floor space is to move equipment up the walls and onto wheels. Vertical storage and mobile carts turn dead corners into working storage.
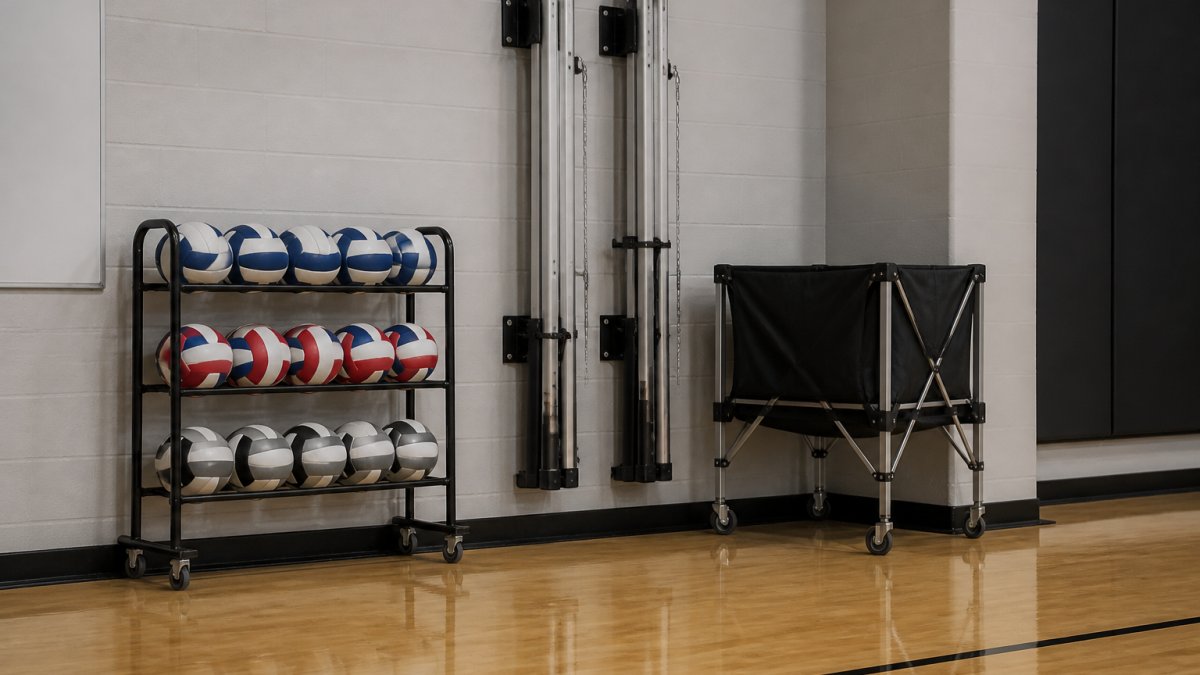
Vertical Racks, Carts, and Wall Hooks
Match each item to the right storage type:
| Equipment | Best Storage Method | Why It Works |
|---|---|---|
| Volleyballs | Tiered ball rack | Keeps balls visible and off the floor |
| Net posts | Vertical wall brackets | Frees corner floor space |
| Nets and antennas | Wall hooks or net bags | Prevents tangling and tension loss |
| Carts and transporters | Designated parking spot | Keeps aisles clear |
| Pole pads | Hook or shelf storage | Protects foam from compression |
Ball storage is the easy win. A tiered rack holds a full practice set in one footprint. For programs with larger inventories, a storage cage keeps everything in one locked unit.

Volleyball Net Storage: Protect Tension and Extend Net Life
Volleyball net storage is about protecting tension, not just tidying up. A net stored bunched or hung on a sharp hook loses shape and tension over time. Store nets loose, dry, and off the floor.
Follow these steps:
- Release tension before you lower the net.
- Coil or fold the net loosely, never tight.
- Hang it on a wide hook or place it in a breathable bag.
- Keep antennas in a labeled bin so they do not bend.
- Check cables and tension tools each time you store the system.
Build a Volleyball Equipment Inventory Checklist
An inventory checklist stops the slow drift of lost balls, missing antennas, and mystery cables. But a list alone is not a system. The facilities that keep volleyball gear under control pair a written checklist with labeling, a check-in/check-out habit, and a seasonal review. The Centers for Disease Control and Prevention recommends routine equipment checks in shared athletic spaces, and a written, owned list is what makes those checks consistent instead of occasional.
Set Up the Inventory System in Four Steps
- Assign a unique ID to every durable item. Net systems, posts, carts, transporters, and ball racks each get a label, a printed tag, a paint-pen number, or a barcode sticker. Consumables like balls get counted by bin, not individually.
- Post a master sheet at the storage room door. One column for the item, one for its ID, one for its assigned zone (A, B, C, or D from your zone plan), and one for condition.
- Run a check-out / check-in log for anything that leaves the room. Carts, transporters, tension tools, and antennas are the items most likely to wander. A simple clipboard or shared spreadsheet with name, item, date out, and date back is enough.
- Schedule the review. A quick weekly count of balls and a monthly full inspection catch problems before a match does.
Monthly Inspection Checklist
Use this starter checklist and adapt the items to your inventory:
- Count all balls by bin and log the total against the master sheet
- Inspect nets for tears, fraying, and stretched mesh
- Test post tension and check cables for fraying or kinks
Seasonal Storage Practices
At the end of a season, do three things before gear goes into long storage: clean and fully dry nets and pads, release tension on net systems and cables, and bag antennas and small parts in labeled bins rather than loose in a drawer. Store nets and pads off the floor and away from exterior walls where humidity swings are largest, a real concern in southern Illinois gyms that see humid summers and cold winters. Label the bins by season and sport so the next setup does not start with a search.
Assign one staff member to own the checklist and the master sheet. A named owner keeps the system from becoming decoration.
Shared Gym Storage Ideas for Multi-Sport Facilities
Shared gym storage ideas matter most in multi-sport facilities, where volleyball gear competes with basketball, indoor soccer, and pickleball equipment. The fix is a zone system. Give each sport its own labeled storage area, and keep shared items in a central spot.
Gared - 3-Tier Volleyball Ball Rack →
Here is how we would set it up:
- Zone A: volleyball net systems, posts, and pads
- Zone B: ball storage racks and cages
- Zone C: carts and transporters
Label every zone with a sign. When basketball season overlaps volleyball season, staff can convert the court setup without hunting for parts.
Plan Your Storage Measurements and Capacity Before You Buy
Measure before you buy. Capacity planning prevents the classic mistake of buying a rack that does not fit the wall or hold the full inventory. The goal is to match three numbers: what you own, what the room can hold, and what the product is built to carry.
Take These Measurements
Bring a tape measure and record each number on your floor sketch:
- Wall length and usable height for brackets and racks. Measure from the floor to the lowest obstruction (sprinkler head, light, HVAC duct), not to the ceiling.
- Doorway width and height for carts and transporters. A cart that does not fit through the equipment room door is a cart that lives in the hallway.
- Floor footprint you can spare without cutting into court clearance or egress routes.
Estimate Capacity Before You Buy
Use a simple count-and-match method rather than guessing:
- Count by category. Total balls, total net systems, total posts, total carts, total pads.
- Add a growth buffer. If you run multiple teams or host tournaments, size for the busiest week of the season, not the quietest.
- Match the product's stated capacity to your count. A tiered ball rack is rated for a specific number of balls per tier, check the product page for the actual capacity rather than assuming. If your program carries more than one rack holds, plan for two racks or a larger cage.
- Check the footprint against your floor sketch. Confirm the rack or cage fits the wall length and does not block a doorway or egress path.
- Confirm the mounting surface. Wall brackets and hooks need solid anchoring, into studs, blocking, or masonry, not drywall alone.
A Simple Capacity Worksheet
| Category | Your Count | Growth Buffer | Target Capacity | Product to Check |
|---|---|---|---|---|
| Volleyballs | ___ | +25% | ___ | Tiered ball rack or storage cage |
| Net systems | ___ | +1 spare | ___ | Wall hooks or net bags |
| Posts | ___ | +1 spare | ___ | Vertical wall brackets |
| Carts / transporters | ___ | +0 | ___ | Designated parking spot |
| Pole pads | ___ | +1 spare | ___ | Hook or shelf storage |
Fill the worksheet in before you shop. It turns a vague "we need more storage" into a specific list you can match against product capacities.

Sports Vista USA carries volleyball storage built for indoor programs, including the Gared 3-Tier Volleyball Ball Rack for smaller inventories and the Gared 4-Tier Volleyball Ball Rack when you need more capacity. For facilities that store balls across several sports, the Gared All Sport Deluxe Ball Storage Cage keeps everything in one secure unit for gyms, schools, and recreation centers.

Safety, Accessibility, and Low-Cost Phased Improvements
Safety and accessibility should shape every storage decision. Heavy items belong low, sharp hooks belong out of reach, and aisles stay clear. The U.S. Access Board publishes accessibility guidance that helps facilities keep routes and equipment reachable for all users.
You do not need to fix everything at once. Phase the work:
- Phase one: clear floor space and label zones
- Phase two: add wall hooks and vertical brackets
- Phase three: add racks and carts for ball storage
- Phase four: upgrade pads and safety accessories
Each phase is affordable on its own. Start with what you already own, then add storage equipment as budget allows.
Conclusion
Storage problems rarely fix themselves, and a cluttered court costs you setup time and safety margin every week. Sports Vista USA offers volleyball nets, posts, padding, and storage equipment built for serious play. Start with a ball rack or storage cage, add wall brackets and carts, and build from there. Browse our volleyball storage lineup and get the right system for your gym.
Frequently Asked Questions
How should a volleyball facility organize its equipment storage?
Start by grouping equipment by how often it is used. Match balls, antennas, and net tension tools go in a rack or cage within arm's reach of the court. Posts, standards, and spare nets go on wall-mounted vertical brackets or a transporter cart at the perimeter. Label every shelf and bin, and post a simple map of the storage room on the door. A quick monthly walk-through keeps the system from drifting back into piles.
What is the best way to store volleyball nets and posts?
Store nets off the floor and loosely folded, never knotted or hung by the mesh, so the tension stays even and the cables do not kink. Collapse or separate posts and lay them on vertical storage brackets or a transporter cart rather than leaning them against a wall. Keep the net and its posts together as a set so setup crews grab one bundle instead of hunting for matching parts.
How can a shared gym store volleyball equipment efficiently?
Give volleyball its own labeled zone with a footprint that does not overlap basketball or pickleball storage. Use a rolling transporter cart so the whole volleyball setup moves out of the way in one trip, and keep a wall-mounted rack for balls and antennas. A shared gym storage plan should list who sets up, who returns gear, and where each item belongs so different user groups follow the same system.
How can a volleyball court storage area be made safer?
Keep walkways and court clearances free of posts, carts, and loose balls, and store heavy items at waist height rather than overhead. Anchor racks and cages so they cannot tip, and check wall hooks and brackets for secure mounting. Round off or pad sharp corners on carts and racks near player traffic, and make sure nothing stored in the room blocks an exit or fire equipment.


Leave a comment
This site is protected by hCaptcha and the hCaptcha Privacy Policy and Terms of Service apply.